Friday, August 19, 2011

5 Quick & Cute Cards

I've finally got my card crafting mojo back! Yay! I love doing cards. They are quick and can satisfy your crafty cravings. And with 2 little boys running around, I need something that I can do quickly, because sure enough...there WILL be an interruption.
Mom, I'm hungry!
Mom, come look at this!
Mom, Brett has a poopy diaper! (lol)
or the baby is crying because he bumped his head (trying to learn to walk)

Ok, on to card #1, I made this one using a free file from SVGcuts blog, which you can snag here. I love all the juicy layers to this svg. It is 4 layers deep! Stunning in person and yet so simple!

This card, I can't take the credit for, I found it in a stash of old scrapbooking goodies that belonged to my aunt, someone did an excellent job on it, so I tore out the inside and recycled it (i do this a lot). I really hope that the people who recieve my cards do this as well, that way the love that went into it can be appreciated by more than one person. The only thing I added to this card are the jewels in the center of the flowers.
It looks to me like it was created using simple scallops that were cut to look like flower petals (brilliant!).


I forget where this adorable little girl is from, but I just love her! I added some stickles to her hairbow. 


This is another card created using a free file from SVGcuts blog. You can get it here. I love how cleanly their images cut and how easy they are to assemble!


And lastly, this one was created using a new file that i just made. You can get it free here.
It has 3 layers. I added a little flower at the bottom, with a button and then a rhinestone on top.
Simple, yet elegant.

Tuesday, August 16, 2011

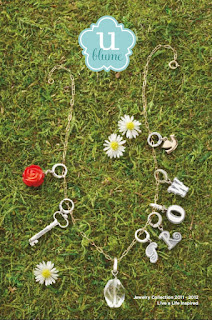
Blume Jewelry Preview!

I am so excited to show you the new Uppercase Living Blume Jewelry catalog!!
It is available for ordering starting Sept 1st!
If you love this jewelry, you'd be a great person to sell it! Just go here to Join My Team!
I'll help you every step of the way!


To get started shopping, go here.

Sunday, August 14, 2011

My new gallery wall!

I love my new gallery wall! I am so excited to show you! I got the idea for it from Shanty 2 Chic!
I bought several picture frames from thrift stores and a couple from walmart. Total cost was about $25! That includes the photos. I edited all of my picture for free using Picnik. To see a tutorial for how to do this yourself, go to Shanty 2 Chic!


Here is a close up! 

Thursday, August 11, 2011

Entertainment Center Before & After

Finally! I found something to hold our 46" TV! I am really not sure if this was what this piece was intended for originally. To me, it looks like a weird bookshelf with lights and red velvet?
Anyhow, i got it at a local thrift store for just $10!


As soon as I got it home, I pulled off all of that hideous red velvet and pulled out a bajillion staples. Then I got some pretty orange fabric with flourishes running through it (hard to tell from photo). I used my handy dandy Fabritac glue to adhere it to the backing and then nailed it back on!
Perfect for my living room!


The fabric cost $10, so I was only out $20 total!


Monday, August 8, 2011

Have you heard of Picnik?

Thanks to Kevin & Amanda's blog, I learned about a FREE little website where you can easily (and fun, might I add) way to edit photos! Here are some examples of what I did with Picnik.

 This was done using their "color boost" feature and a little "vignette" feature which adds the dark edges.


This was done using the "Holga-ish" feature. I love how professional this looks! 
This is a feature called "60's style" Love the old look!
  

This features is a "soft focus" you choose where you want to focus! 

This change is very subtle! If you notice only he and the swing are in color! 


This is another example of "Holga-ish". 

This is another example of the "vignette" and "color boost" combo with a little "soft focus" added.

I hope you learned a little something. I am not a pro at this, I just learned by playing around with the settings. It is a very easy to use site and a lot of fun to play with! It allows you to save the edited photo directly to your computer. The site is free, however if you would like to use some of their upgraded features, you have to pay. You can try them out for free though! They even have upgrades that allow you to diminish wrinkles, add a tan, add makeup and remove blemishes! Talk about photoshoped! LOL. It is a lot of fun to play with even if you don't choose to upgrade. *BTW, I'm not paid to say any of this, I just love the site!
So go play and enjoy feeling like a pro at editing your photos!


Getting Crafty with Vinyl

As  some of you know, I'm an Uppercase Living demonstrator and while I was in Las Vegas at the 2011 UL Convention, I got these cute little owls! I decided to fancy them up a bit. First, I swiped some Stampin' Up lumiere pearl paint randomly across the canvas at a diagonal, then I applied a coat of modge podge. When all was dry, I added the owls, some ribbon, jewels and buttons! Easy, cute and cheap decor!
You can buy our vinyl in more than 50 colors, so these owls are customizable! You can find them by going to our site and searching for "Three Hoots" or item # 18788.
This is the smallest size and they are $23.95
Shipping is just $5.95!