Every year one side of my family has a big barbeque on the Fourth of July and it is kind of a reunion for all of us who don't get to see each other that often. So I made this cute little digi invitation in honor of that. I used Lindsay's Patriotic Collection which is half off right now! Just $2.50 for a whole bunch of cute patriotic items!
The card was created in Paint.net (a free program found online) and if you'd like a tutorial on how to color your alter your digi's in paint.net scroll down. (But bare with me, this is my first tutorial, sorry it is so long.)
Tutorial for Altering Digital Stamps
1. Open your digi stamp in Paint.net
2. Use magic wand to select portions you want to delete in order to change color (see picture).

3. Open digi paper in Paint.net (don't worry your digi will still be open, see top right hand side of screen).
4. Go back to digi stamp by clicking on the window in the top right part of the screen, choose CTRL+A to select all and then CTRL + C to copy it.
5. Go back to digi paper (again by clicking little window), and choose Layers –Add Layer. (do not skip this step)
6. Now hit CTRL + V to paste digi stamp on top of paper.

7. Now choose Layers—Merge Layer Down. (Just the digi stamp should be selected during and after merging.
8. Now hit CTRL +C to copy digi stamp and click FILE—New to open new canvas.
9. Click CTRL + V to paste the altered digi stamp onto the new canvas. (At this point you may delete the original digi and the digi paper if you’re finished with it.

---At this point if you are finished with alterations, you can save it as a jpeg or png.
If not, continue following directions.
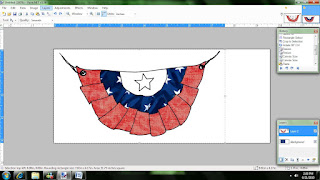
Since Lindsay's stamps are all hand drawn, which is what makes them all so special, there may be a few places in the digi where the lines don't meet up perfectly (see picture below). This isn't a problem unless you're trying to highlight a particular portion of the digi with the magic wand. As you can see in the picture, it has highlighted everything that is left on hte digi (including the star, which also has a line that isn't connected.)In this case, we will need to connect the lines using the "paint brush" tool. Note: it is easier to do this if you zoom in and you may have to adjust your brush size accordingly.
In this picture you can see that the unconnected line has been corrected and I was able to select just the bottom portion with the magic wand.
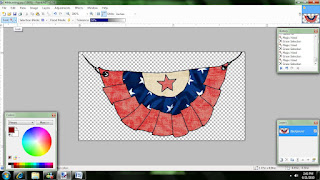
10. Next use the magic wand to select another portion of digi stamp to alter and delete it. (the picture above shows it being selected, the picture below shows it after it is deleted.)
11. Now repeat steps 3-9.
Here I have opened my second patterened paper (which I pulled off of google).
 This is after I have created a new layer on the paper, copied and pasted my digi in a new layer over the paper and then merged the layer down. Then I opened a new canvas and pasted my altered digi there.
  This is after I have repeated the steps once more with a 3rd paper. Finally I have my digi finished.
12. When you’re finished altering your digi, you can delete the white space around it and in between the holes using the magic wand. (see picture above.
13. Now you can choose File—Save As and change it to a PNG so it can be layered without the white space around it.
Phew! That was a long tutorial. Lots of pictures. But I had several people mention that they'd like for me to do one, so please if you requested this, read over it for me and see if it makes sense. Since this is my first tutorial I am a little nervous about how well it was worded. Thank you!
As always, stop by Lindsay's blog to grab a freebie and check out the rest of the DT's work!
Now for the fun part! Your Thursday Freebie! I thought she looked somewhat festive for the 4th! Also, if you haven't been by my blog in a while, check out the previous posts for several freebies!


so that's how you do it! great tutorial!
ReplyDeleteThank you so much for this post. I want to let you know that I posted a link to your blog in Creative Busy Hands Cricut Freebies Search List, under the Elements post on Jul. 01, 2010. Thanks again.
ReplyDeleteGreat tutorial! Thank you! Thank you! This invitation turned out fabulous! You are sooo smart!
ReplyDeleteOooo thank you for the tutorial Tamara I will def. bookmark this!! Thanks for the freebie also!!
ReplyDeleteThank you for this tutorial! I am just getting into photo editing programs and am still learning all this.
ReplyDeleteI love your invite! Very clever & cute!
OMG, you must have heard me scream last night, lol....... AWESOME tutorial your invite ROCKS! Totally love it.
ReplyDeletehugs
PS: Eclipse tomorrow night. So looking forward to immerse myself in the story and forget about everything.
Wow! Awesome tutorial Tamara!
ReplyDeleteTamara......great tutorial! Love it! Have a great time at your families party! We do the same and this year is extra special because my brother (Marine) deploys in 1 1/2 weeks. And how cute is lil miss ladybug! Thanks AGAIN for your generocity! :)
ReplyDeleteKaren
Very cute ladybug, I will have to check into your tutorial, I have never heard of this program, thanks!
ReplyDeleteJust a quick note to let you know that a link to this post will be placed on CraftCrave today [02 Jul 01:12pm GMT]. Thanks, Maria
ReplyDeleteAwesome tutorial, ant that invitation rocks! ~Diane
ReplyDeleteLove this invite and what a great tut!
ReplyDeleteThank you, I'm going to have to try this! Great tutorial : )
ReplyDeleteLove and hugs ~
Lori